Shoot that phone before it's gone

Today I photographed a payphone that I’ve passed everyday since my move to CoRK. It sits on the corner of McDuff and Rosselle. I thought many times about taking this photo, I don’t know why it became such a big deal. Where to park, where to stand, what lens, will people be watching, what time of day…overthinking much?

It was the guilt of knowing that one day this phone would be gone without my record of it that finally put me over the top. Funny how the mind tricks you into doing something.

I pulled into the parking lot of the adjacent laundromat and quickly exited my vehicle. There were people in the building, and for some reason this was of concern to me. I soon realized that I parked behind the phone and that my vehicle would be in the shot if I chose to include the building and sign. Darn!

Burned into our DNA, the reflexive action of picking up the handset and listening for a dialtone took over, and then checking the coin return for change. That’s the ritual when approaching a payphone. Unfortunately the phone was dead, no surprise there.

I had the camera on a tripod and thought I needed it, which made things more awkward. The phone is actually positioned quite low for handicap purposes so I had to fuss with the legs and get everything set up. Also I was using a new camera and was having some challenges learning how to use the autofocus, so I messed with that a while. What would probably appear as a comedy of errors I finally got in a position to take a shot. Then I decided to move back off the sidewalk into the street which required a tripod leg adjustment and a diligent watch for traffic. Finally my shots were done, with a typical understanding that I needed to return to get the wider shot that included the laundromat and not my car.

Things aren’t always this difficult when making images but even after all these years I still manage to get befuddled over simple things. Little did I know that this opener shot would start an obsession to find every payphone in Jacksonville…more on that later. For now, I got the shot I wanted.

Most of my progress on this project is posted to Instagram - @dougengphoto

Click here for the Series Images.

716 McDuff S at Rosselle

MOCA Interview

Here is an interview on Nature of Structure | Structure of Nature on the MOCA Blog. It’s fun to talk about your work, and then have it recorded for posterity. I think our feelings and thought about what we do and why we do it changes over time, and I’ll be interested to re-read this in a few years. Thanks to Skyler Dunbar for her patience in doing the interview (I tend to get “wordy”) and for doing the transcription.

Structure of Nature | Nature of Structure

Our exhibition opens tonight at MOCA Jacksonville and I have to say I’m exhausted and excited! I’ll be catching up with the blog with some behind the scenes stories, if you want faster updates follow me on Instagram, @dougengphoto.

For those of you looking for the exhibition catalogue that accompanies the exhibit, here is the link to my store to pre-order the book. We are going to include some installation photos and I’ll do those next week.

If you do attend the opening I hope to see you there!

DJE-Slide_14.jpg

Bogey Creek return

I returned to Bogey Creek today with wading boots hoping to get into a cypress swamp area that was flooded. As I waded slowly in, the water quickly came up to the top of my boots near my knees and I chickened out, not wanting a boot full of swamp water. I’ll check back later when things dry out. The sun was still darting in and out and it was definitely going to rain. A quick hike to check the marsh and then on to Cedar Pt. down the street.

Not going much further in here…

Not going much further in here…

Nice sights on the way to the marsh

Nice sights on the way to the marsh

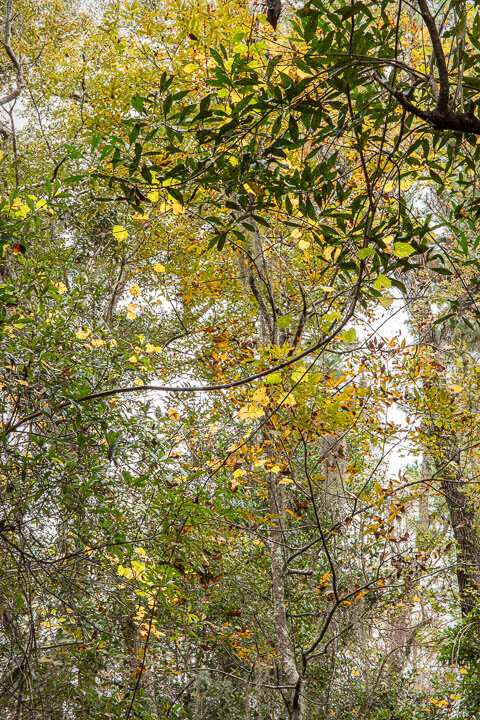
Florida autumn

Florida autumn

Bogey Creek Preserve

Nestled within the Timucuan Preserve is a small parcel of land called the Bogey Creek Preserve. The North Florida Land Trust was instrumental in acquiring these 75 acres of wilderness and converting it into a public park, with hiking trails and a kayak landing. I made my second visit here today under partly cloudy skies, the sun was rather strong for my typical forest shooting so I headed for the marsh to do some cloud watching. In Florida you need patience to wait for conditions to change. A cloudless sky soon disappeared for about an hour, then went cloudless again. Just enough time to record the day.

Cloud gazing, view from Bogey Creek Landing

Cloud gazing, view from Bogey Creek Landing

Another view from the landing

Another view from the landing

Cypress forest backdrop

Cypress forest backdrop

Some tough shooting under cloudless skies

Some tough shooting under cloudless skies


Ft. George Island Road

Along Ft. George Island Rd.

Along Ft. George Island Rd.

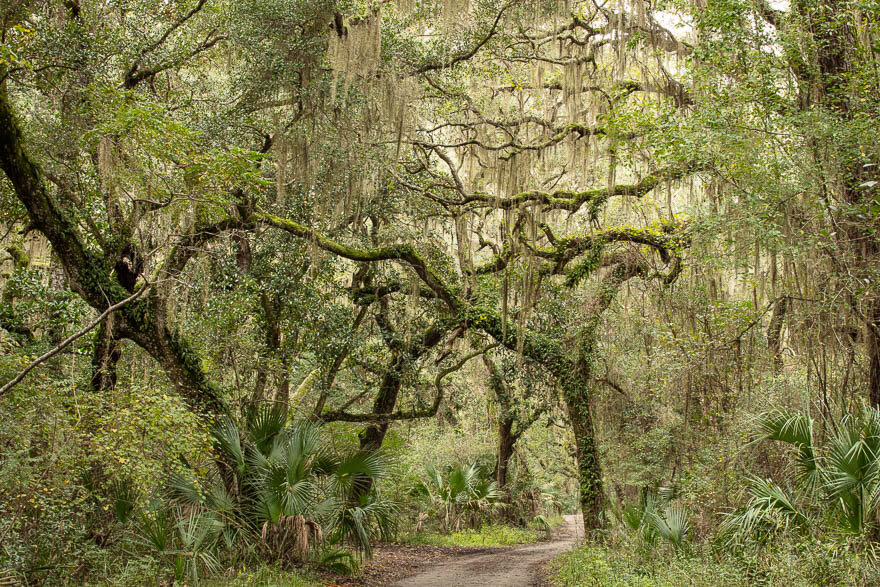
A favorite scenic drive is the loop to the Kingsley Plantation on Ft. George Island. Live oaks and magnolias grace this dirt road, and a trail takes you deeper into the forest. I usually wait for an overcast day, but today I arrived late (around noon) and was willing to take anything that was available. The morning was totally cloudy but as I crossed the Dames Point Bridge the sun started to break through. We’ve heard this story before! But always press on, because we never know what the light will be like until we get there.

I stopped when the pavement ended and got out to start the party. The light was good, and I sprayed myself down and got things ready. I saw between the canopy some blue sky and the sun darted in and out between the clouds. I’m actually good with these conditions as it brings variety to the scene, as long as there are periods of shade.

I then proceeded to the trailhead and walked south a few hundred yards. Yesterday I got a flu shot and was not feeling like taking a big hike, so after a few images I decided to pack it in. Overall I was pleased with the trip and upon looking at my archive of images I was surprised that the last time I was shooting here was in February of 2012, a long time ago.

My feelings today

My feelings today

Meaning in a branch

Meaning in a branch

New Beginnings

Yesterday the results of the 2020 election were released. Regardless of your political affiliation, there is relief that this election is over. I feel as if a great dark cloud has lifted and look forward to brighter days ahead. Our emotional environment is critical to our ability to be creative. For the past few months things have been tough, a result of Covid-19 and exacerbated by the national conversation. We have gotten through one of the hurdles, now we need to focus on the other.

Sunrise over Manti La-Sal, 2012

Sunrise over Manti La-Sal, 2012

The morning I captured this sunrise, Dorian and I were on our way to Goblin Valley State Park in Utah. We were late for the sunrise at the park, and as we drove down the road the sun began to make an appearance. We decided to stop and watch. I quickly set up, and knew that this was going to be a good one. Everything was over within 10 minutes, and the day continued on, but being witness to this moment left a permanent impression on that day, just like yesterday, November 7, when the Presidential announcement was made.

Marsh and Clouds

Every Florida landscape photographer knows the one thing we have in abundance is clouds. When the time is right, the clouds arrive to turn any landscape into an incredible sight. Having missed the thunderstorms and stupendous clouds of summer, I knew the cloud season was coming to an end. When the weather begins to cool and the sky turns gray we will all long for those massive clouds. It was midday and the clouds as I left my neighborhood Lowes were awesome, so I decided to head to Big Talbot Island to shoot some clouds. It’s about a 40 minute drive, and as I crossed the Dames Point Bridge and turned east on Hecksher Drive I noticed the sky beginning to clear. What? Undeterred, I kept driving and as I pulled into the parking lot at the Sawpit Creek boat ramp I was disappointed. I grabbed my camera and walked out to the launch area and waited. Weather changes fast in Florida. Within 10 minutes clouds began to arrive and I was ready. Before long I was back in business.

Looking west from Big Talbot Island

Looking west from Big Talbot Island

I really wanted a shot from Simpson’s Creek, and stopped at the pullout right before the bridge. No luck, no clouds of any consequence. Time to move on. Next stop, Alimacani Park at Ft. George Inlet at the foot of the big bridge as you are leaving Little Talbot Island. I could see some big clouds overhead and It was time to pull out the 17mm T/S lens.

From Hecksher Drive at the turnaround to Alimacani Park

From Hecksher Drive at the turnaround to Alimacani Park

Onwards to the Jim King Boat Ramp which has a nice park and long dock and Kayak launch area. Lots of people fishing here with a great view of the marsh on Clapboard Creek. I’m usually here early in the morning alone.

At the Jim King Boat Ramp looking at Clapboard Creek

At the Jim King Boat Ramp looking at Clapboard Creek

From Hecksher Drive I headed north on New Berlin Road to Cedar Point on the Timucuan Preserve, another boat launch with a great view of marshes. Expectations were high. Ah, no one on the dock, just a few trucks with empty trailer in the parking area.

Cedar Point

Cedar Point

From Cedar Point it’s a quick ride to Pumpkin Hill Creek Preserve, with a kayak launch area and great views of the marsh on Clapboard Creek.

Clapboard Creek from the kayak launch area in the Pumpkin Hill Preserve

Clapboard Creek from the kayak launch area in the Pumpkin Hill Preserve

Next door is the Betz-Tiger Point Preserve, which is a Jacksonville regional park (good job Jacksonville!). There is a new observation dock called the Edwards Creek Day Use Area. The road was not open for vehicles, so there’s always a choice to walk (2 miles). Great view!

A great day in Jacksonville for marsh and clouds!

Edwards Creek Day Use Area

Edwards Creek Day Use Area

Touching base with Guana

Marsh view before sunrise

Marsh view before sunrise

The last time I was at the Guana Preserve was 2017, hard to believe. I ventured out this morning, hoping to dodge the predicted rain. Of course, there were few clouds and it was steamy. I started from the parking lot at the reservoir, and headed straight up Shell Bluff Rd and onto the Guana Loop. Parts of the loop were flooded so I backtracked and took Marshview Lane around. The mosquitoes were hungry. After sunrise the photo day ended, but I found some nice marsh areas for future reference. You never know what the day will bring. As I was leaving I noticed some rain clouds forming overhead. Looking forward to another day!

Nature’s tapestry

Nature’s tapestry

Plant on a stick

Plant on a stick

Dueling branches

Dueling branches

Looking south, rain clouds moving in

Looking south, rain clouds moving in

A dawn's peace

View looking south, before the sunrise

View looking south, before the sunrise

This morning I decided to visit a favorite spot on the Timucuan Preserve - Round Marsh. This area has a raised platform and a 280 degree view of North Florida wetlands, a view that is iconic for the area. I parked at the trailhead for the Blue Trail in the Theodore Roosevelt parking lot. It was pitch dark and I had a 30 minute hike out to the platform. I really forgot about bringing a flashlight or headlamp, but there is always the phone! After about 25 minutes of walking the sky was beginning to lighten, also bringing out the mosquitoes. I was relieved to see the platform, empty. I have no problem sharing the view, but it somehow feels intrusive to disturb someone’s early morning experience.

I arrived early enough to make some photographs before the sunrise. This is often when everything is quiet, and I can settle down from the walk. Usually I’m running late and it’s a workout to haul a bunch of camera gear and setup before the magic happens.

I could see that the weather report was wrong and there were very few clouds. This is always disappointing because once the sun comes up things are essentially over. It’s useless for me to plan these trips so I let serendipity rule. I’m here and that’s the whole point of the experience.

A small band of clouds blocked the sun for a few minutes as the marsh started to wake up

A small band of clouds blocked the sun for a few minutes as the marsh started to wake up

Looking north, after the sun broke through the clouds

Looking north, after the sun broke through the clouds

Ghosts on Christopher Creek

1N9A7884.jpg

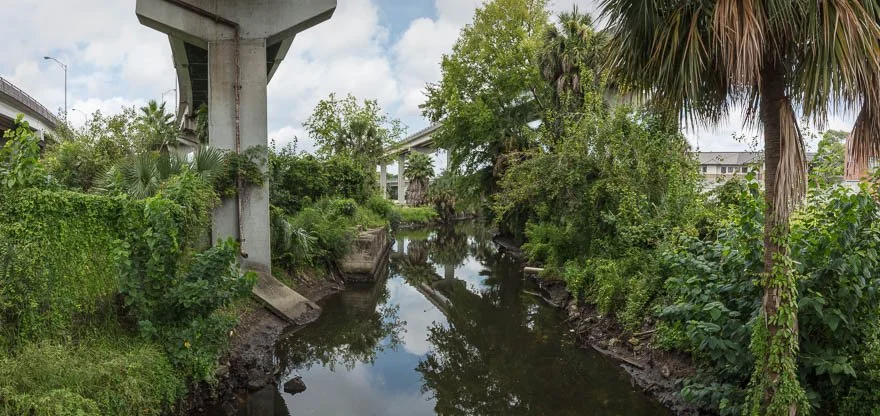
I’m not sure when these trees died. I’ve traveled this part of San Jose Blvd for almost 60 years, as a youngster going to the A&P for groceries in nearby Lakewood. Now I drive by this location every day coming home from the studio. Many wonder what killed the large cypress trees. The answer is the increased salinity of the St. Johns River caused by a number of factors - dredging of the river, decreased freshwater flow upstream, rising ocean levels, and development of the riverbank. There are very few natural places on the shoreline and as one expects, the health of the remaining trees is in serious decline. One day these trunks will be gone along with the reminder of the forest that was here.

A common scene along the St Johns River, when you can find a tree

A common scene along the St Johns River, when you can find a tree

Life and Death.jpg

Ghost Forests

GhostForest-2020-1009-133.jpg

This morning I spent an incredibly introspective morning visiting the backyard of James Hunter’s property on Clapboard Creek. The scene is increasingly common in Florida - skeletons of dead trees dotting the landscape, victims of environmental changes creating toxic conditions. The feeling was haunting and sad, as more changes are expected to happen at an accelerated rate due to climate change, dredging, and encroaching development of the marsh “edges” into industrial or residential sites. Hunter’s attachment to his property and concerns for its future are evident. For 20 years he witnessed a massive alteration of the landscape as power plants, port facilities, and luxury housing developments transformed thousands of acres of primeval wetlands. While protections exist as designated local and national preserves, most of the land is privately owned and the development threat continues. Loss of habitat due to salt water intrusion, a by product of dredging, is a real issue that has long term implications, like the loss of trees.

More to come from me on Florida’s Ghost Forests.

GhostForest-2020-1009-008.jpg
GhostForest-2020-1009-032.jpg

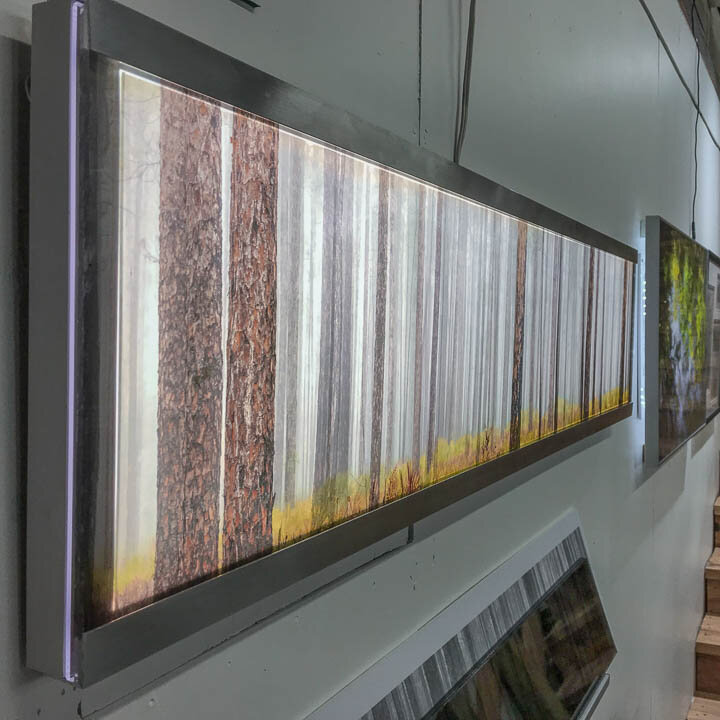
Backlit Photographs

Experimental backlit layered images (3) printed on HP Clear Film using 1’x4’ LED light fixture

Experimental backlit layered images (3) printed on HP Clear Film using 1’x4’ LED light fixture

We are consumers of backlit media. Starting from TVs, then tablets to phones, the majority of images that we see are backlit. The sign and tradeshow industry has always championed methods to produce large attention-grabbing graphical displays, and they figured out the backlit format many years ago. I started printing on Epson Display Trans Backlight media several years ago, and have always been impressed with the image quality and effectiveness of the media’s ability to disperse the lighting source throughout the display. The problem for most applications is not the print itself but the requirements of the lighting source and the mounting issues of the print. With the advent of affordable LED grids and edge strips, intense light at lower power consumption and small form factor has made the construction of large light boxes possible, as an alternative to fluorescent fixture installations. But the securing of the print remains an issue for large displays.

For photographers with pigment based printers (i.e., our Epson, Canon, and HP inkjets) we have the ability to print on the media, but the mount poses some specific problems. The surface of the print is fragile and subject to scratching, and if fronted with a piece of glazing, subject to moisture retention and adhesion. The print itself must also be supported by a piece of clear substrate, either face mounted or back mounted.

Face-mount acrylics are prevalent throughout the industry and produce stunning prints. This is the technique where a clear acrylic sheet is adhered to the face of the print with a clear adhesive, similar to a big piece of double stick tape. As you can imagine, this requires meticulous attention to detail and dust-free conditions, and these mountings are very expensive ($75/sf and more). Yes, you can use this technique to mount a backlit media print, but for a 4x8 panel, this can be quite expensive ($2400+). And I would challenge you to find a vendor who would be willing to do a 4x8 sheet.

The alternative I have been exploring is applying a vinyl over-laminate to the backlit-media print, then back mounting the print to acrylic. The vinyl over-laminate seals and protects the surface of the print (much like a Waffle House menu) and the application of the over-laminate does not require the critical conditions of the acrylic face-mount. A tiny bit of dust is not visible. For heavily trafficked areas like hospital corridors, an additional piece of acrylic or tempered glass can be placed in front of the mount without fear of sticking or moisture conditions. This also allows change-out of the graphic should conditions warrant.

Recently I invested in a large format laminator so that i could handle substrates up to 54” wide. This is basically two silicone rollers that allow you to apply various roll laminates to materials as they pass through the machine. They are low-tech but precision instruments and I have to confess, needs some practice to master. Making a fair share of screw-ups is a required right of passage. In other words, don’t run that 4x8 sheet of acrylic on your first try.

Many photographers elect not to get involved with production processes, or even printing. I completely understand this position, and if I were not a masochist with the production side of the print I would not put money, time, and significant effort into mastering these techniques. It does bother me that a $400 image license is turned into a $6000 production job, and that the artist misses out on a significant part of the value for a piece because they do not participate in production (which is an art unto itself). It is not an impossible task to accomplish, but not for the weak of heart.

Here are a few projects made with this technique. Sizes range from 25’x8’, 13’x5’, 9’x9’.

IMG_9004.jpg
IMG_0098.jpg
IMG_0863.jpg
IMG_0864.jpg
IMG_0898.jpg

Tubeville

Sometimes a break from photography is in order. A client requested an “over the sofa” lobby piece and a photograph wouldn’t do. We went through some ideas and I was inspired by a piece made from recycled mailing tubes. I had an attic full of cardboard cores from the print paper rolls and this looked like a perfect idea to steal. I prepared a few designs and came up with something that resembled soap bubbles bunched together. I wanted to give the piece a feeling of a rolling hill so I varied the tube lengths. I had two tube diameters, 3” and 2”, and each tube had it’s own characteristics of color, thickness, and texture. This added some welcome randomness.

tubes.jpg

Cutting the cores on a band saw was not as easy as I thought, the blade wandered as it passed through the material, also leaving a rough edge on the pull out. I didn’t like the messy cuts so I sanded the edges on the inside and out, both ends. There were over 600 tubes of varying lengths, creating a lot of sanding. Then I coated each tube with an acrylic coating for some protection.

On the workbench I setup a wood frame sized to 24” x 72” forming the boundary. I began filling the space with tubes, initially following the design but then just winging it. This was a great exercise in trusting your instincts to place the tubes by feeling instead of purpose. After the dry run, it was time to glue things together. There is a bit of hesitation as one commits to permanent placement of a piece, not that it really matters but you always question the intention, was it the right piece, the right height, the right gap, the right alignment. We are always concerned about being “right”, and after doing this 600 times, you develop a degree of confidence that one can place a cardboard tube in a good position. Ah the rewards of making art!

process.jpg

It took about 3 days to glue everything together, no problems…yet. I let things set for another day. I knew that the assembly would be heavy, and this thing was a solid mass of cardboard. I disassembled the frame and expected the piece to just slide off the Formica surface of the table, but it didn’t budge. I pushed a little harder, then attempted to lift a corner. No movement whatsoever. Tried to slide a putty knife under a tube where I saw glue that had run out of the joint onto the table. Finally got out my hammer and broke through the glue bond to the table. Since when did wood glue stick to plastic? I had that sinking feeling that I would need to chisel out my sculpture from its base. Luckily i had used a wax paper sheet under half of the piece, but the other half was hopelessly glued down.

I took my framing square and hammer and got to work. I literally hammered the steel under a third of the tubes when things broke free. Two sections were damaged in the process and I went to work repairing those, wax paper underneath. When everything dried up, I trimmed some of the glue globs off the bottom and built a backing board with 4 - 1” dowels to hold the piece to the board. Then I drilled holes in the board to attach to the wall. Having a 50 lb sculpture is a bit unnerving to handle by yourself, but there were no further incidents thank goodness.

IMG_0803.jpg
IMG_0802.jpg

After completing the piece I felt rewarded by the result. I am interested in landscapes, and the piece was big enough to evoke a sense of dimension to the plane. There was enough variation of the surface to evoke interest, and some nooks and crannies that I wanted to crawl into. Expect to see more of these creations in the future.

MOCA Studio Sessions

I was asked by MOCA Jax to share some thoughts on how the pandemic has affected my practice and what I’m doing during this time. It’s always a challenge to produce a video, even more so one about yourself. I decided to run with one take and not agonize over the task (we have enough to agonize over these days). Here’s what I came up with. If you haven’t been to my studio in a while, at least you’ll get a little tour. Thanks for viewing!

Fractured Forests on Lenscratch

I’m always thrilled to be featured on Lenscratch, a fine art photography daily that tracks the pulse of what’s happening in the contemporary photography world. The editor of the Art and Science series, Linda Alterwitz, is an accomplished artist in her own right. We first met at a marketing master class given by Mary Virginia Swanson in Tucson back in 2014. Linda adds her own insightful comments to this project, that continues to have relevance in our current environmental collision with climate change.

The Fractured Forests project page can be viewed here.